 Time and time again I am asked numerous questions about Interactive Notebooks because people know that I not only LOVE INBs but I have been using them, creating them and training other teachers on them for the better part of the past decade. Recently one of my Facebook Group members asked, “How do you go about setting up Interactive Notebooks from the beginning?” and when she asked this I knew that I needed to share this with you.
Let me first tell you, there is not one right way to set up your interactive notebook and just because I do it one way doesn’t mean that you have to follow it 110%. You know the way that you teach and you know what will work for you in the long run so knowing what will need to be in your set up to make it work best for you is important. This is why I created free planning sheets– you can plan out the pages and what will go on each page before actually gluing anything down.
Creating a Plan
You need to start by asking yourself, “What items do my students need as reference points throughout the school year to be successful?” This question alone will help guide you as you are setting things up.
- Do you want your students to decorate a cover page to help to build buy in for the year and also so that you can identify which interactive notebook belongs to each student? What about decorating the cover?
- Do you want to go through and have them mark the page numbers? All page numbers or just the ones on the right side? (Tip: The reason I say just the right side is first, it is easy to quickly thumb through and number the entire notebook and second, when students turn to that page having a blank page number serves as a reminder to go and update their Table of Contents.)
- Do you want students keeping track of everything that you put into the notebook in a Table of Contents? Typically I would say that you need 4 pages for this (2 pages front and back)
- Are you going to be grading the notebooks regularly? Do you have a grading rubric that you want to provide to the students so that they know what to expect?
- Are there some helpful tips/reminders that you want your students to have access to at all times during the year? Examples for this would be a math formula chart, multiplication chart, problem solving strategies, a periodic table, reading strategies, commonly misspelled words list, a map of the US/World, etc.
Setting Up Interactive Notebooks with Students
Now that you have taken some time and planned out the front matter for your notebook, you need to transfer that to taking time to setting things up with your students. I will tell you, it will not all happen overnight. I always do all of my set-up with my students but I do know some teachers who have filmed videos and assigned the set-up as homework which I think is an amazing use of the limited time that we all have in the classroom.
Look at your calendar and see how you want to start it all out. Typically I start with the cover, page numbers and setting up the table of contents and move on from there adding as we go. Skipping pages isn’t an issue when you are setting it up because you will come back to those pages and it doesn’t have to all be done in the first week! Below is a loose plan that I have used for many years for my Front Matter and it works for me in my classroom.
- Page 1 – Cover Page that student’s decorate to express themselves as long as it has their name, my name and the period that they have me on it.
- Page 2 – Since I graded my notebooks regularly this page was saved for the Grading Rubric. Having it right behind the cover made it easy to find for the students when we did peer grading and easy for me to locate when I did the grading.
- Page 3 through 6 – These were the Table of Contents. I always wanted these near the beginning of the notebook so that they would reflect all of the components of the notebook. Now I know some teachers do Unit Table of Contents and that’s perfectly fine. Go with what works for you!
- Page 7 and 8 – We have a formula chart in the State of Texas that we get on our Math state test (otherwise known as STAAR). I really wanted my students familiar with this formula chart before they saw it on test day so I had them keep a copy of this in their notebook as well.
- Page 9 – For me it was important to see what the goals for my students were and this was the page that I allowed for that. Typically I referred back to this page if I had issues arise with the student because we could bring it all back to what their goals were and how the behavior happening wasn’t helping them reach their goals.
- Page 10 – And last, but not least, I gave my students a multiplication chart that they could refer to throughout the year. Yes, I taught middle school but my students still struggled with multiplication facts and I wanted them to use the chart if needed. I also was able to use later on in the year to show them how to use the chart for equivalent fractions, ratios, etc.
Interactive Notebooks in Action
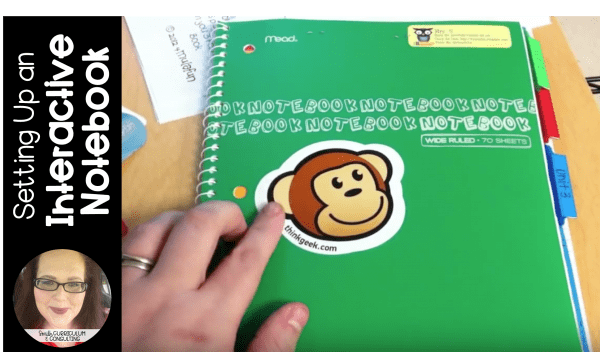
I know that pictures are worth a thousand words (and I’m getting close to that here already) but I want you to check out the video that I filmed back in 2012 that shows my Interactive Notebook from the classroom that is nowhere near “Pinterest Perfect” but it’s real and it was what we did that year and let me tell you, my students LOVED it!
More Videos to Check Out
- Setting Up Your Interactive Notebook (7th Grade Math)
- Starting the New Year with Interactive Notebooks
- Planning and Setting Up Interactive Notebooks for Teachers
So now that you have seen them in action I hope that this will ease your mind that you can set up your Interactive Notebook in anyway that you see fit and there are not Interactive Notebook police that are going to come after you.
Teach Me About Math Workshop!
Looking for all the latest about using Math Workshop in the Middle Grades? Join today and grab the FREE Editable Math Workshop Sheets and all of the great emails to come your way!
Success! Now check your email to confirm your subscription.


