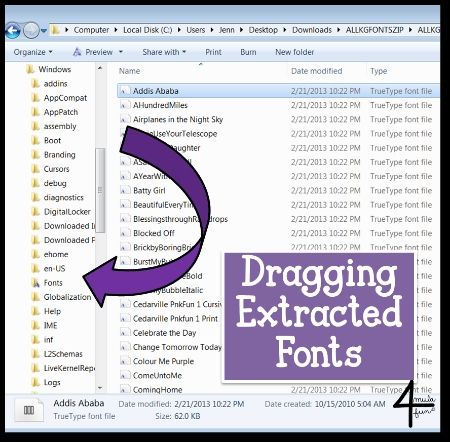
After fielding a few questions lately on installing fonts in Windows, I thought it was time I go ahead and type of the steps I go through so that I could share them with the world rather than just the 5-10 people who have asked me recently.
Now, I will start with I am not technology guru, I’m very technology literate (is that a term?) but I do a lot of my own work-arounds if whatever I find on Google is too confusing or my techie friends can’t help me in human-speak.

Step By Step:
1. Extract your fonts if they are in zip format.
2. Open Windows Explorer to where you have extracted your fonts.
3. Select the font (or fonts) that you want to “install”.
4. Make sure your C: drive folder is open in the left side bar and you can see the Fonts folder.
5. Drag your fonts from the folder they are extracted into to the Fonts folder. They should automatically install.
I really hope this helps some of you out and would love to hear if it did or if it just totally bombed. If it worked, feel free to pin the post so others can enjoy it as well!
{Font Credit in picture to Kimberly Geswein Fonts– check out her amazing fonts here!}
Teach Me About Math Workshop!
Looking for all the latest about using Math Workshop in the Middle Grades? Join today and grab the FREE Editable Math Workshop Sheets and all of the great emails to come your way!
Success! Now check your email to confirm your subscription.


